
In the fast-paced world of technology, maintaining the optimal performance of your MacBook is crucial. One effective way to ensure your MacBook runs smoothly is by regularly clearing its cache. Over time, cached files can accumulate and bog down your system, leading to sluggish performance and reduced efficiency. In this comprehensive guide, we’ll walk you through the process of clearing cache on your MacBook, step by step.
Understanding Cache: What is it and Why Clear it?
Before diving into the clearing process, it’s essential to understand what cache is and why it’s important to clear it regularly. Cache is a temporary storage location on your MacBook that stores frequently accessed data for quick retrieval. While cache serves a valuable purpose in speeding up processes and reducing load times, it can also become cluttered with outdated or unnecessary files over time. Clearing the cache helps free up valuable disk space and ensures that your MacBook operates at its best.
Types of Cache on MacBook
MacBooks store various types of cache to enhance performance in different areas. Understanding these different cache types can help you identify which ones may need clearing.
- System Cache: This includes system files and components that macOS uses to operate efficiently.
- User Cache: User-specific cache files generated by applications you use regularly.
- Browser Cache: Cached web data stored by internet browsers such as Safari, Chrome, or Firefox.
- App Cache: Cache files created by specific applications installed on your MacBook.
- Font Cache: Cache files related to font rendering and display on your MacBook.
Step-by-Step Guide to Clearing Cache on MacBook
Now that we’ve covered the basics let’s dive into the step-by-step process of clearing cache on your MacBook.
Step 1: Back Up Your Data
Before making any changes to your system, it’s essential to back up your important data. While clearing cache typically doesn’t pose a risk to your files, it’s always better to err on the side of caution.
Step 2: Clear System Cache
To clear system cache on your MacBook, follow these steps:
- Open Finder: Click on the Finder icon in your Dock or navigate to it using Spotlight.
- Go to “Go”: In the menu bar at the top of the screen, click on “Go.”
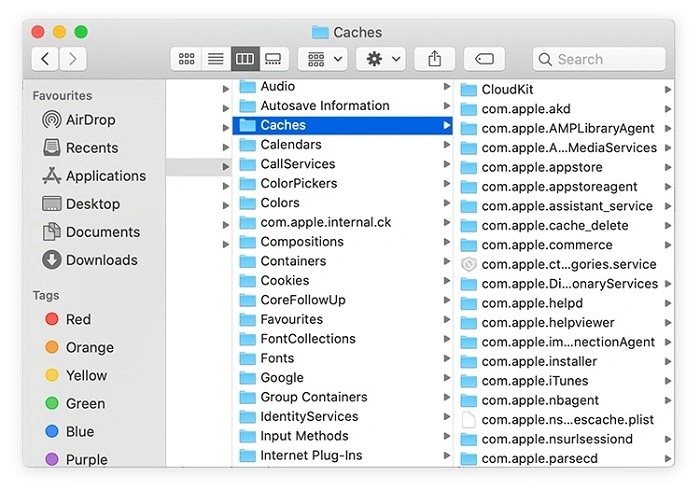
- Select “Go to Folder”: Type “/Library/Caches” in the dialog box and hit Enter.
- Delete Cache Files: Select all the files in the Cache folder and move them to the Trash.
- Empty Trash: Once you’ve moved the cache files to the Trash, empty it to permanently delete the files.
Step 3: Clear User Cache
User cache files are located in a different directory. Follow these steps to clear user cache:
- Open Finder: Launch Finder.
- Go to “Go”: Click on “Go” in the menu bar.
- Select “Go to Folder”: Type “~/Library/Caches” in the dialog box and hit Enter.
- Delete Cache Files: Similar to clearing system cache, select all the files in the Cache folder and move them to the Trash.
- Empty Trash: Empty the Trash to remove the cache files permanently.
Step 4: Clear Browser Cache
Each web browser stores cached data separately. Here’s how to clear cache for popular browsers:
- Safari: Open Safari, click on “Safari” in the menu bar, select “Preferences,” go to the “Privacy” tab, and click “Manage Website Data.” From here, you can remove cached data for specific websites or click “Remove All” to clear all cache.
- Chrome: Open Chrome, click on the three-dot menu icon in the top-right corner, go to “More tools,” and select “Clear browsing data.” Choose the time range and types of data you want to clear, then click “Clear data.”
- Firefox: Open Firefox, click on the menu icon (three horizontal lines) in the top-right corner, select “Options,” go to the “Privacy & Security” tab, scroll down to the “Cookies and Site Data” section, and click on “Clear Data.” Check the box next to “Cached Web Content” and click “Clear.”
Step 5: Clear App Cache
Some applications store cache locally on your MacBook. While the process varies for each app, you can typically find cache-clearing options within the preferences or settings menu of the respective applications. Look for options like “Clear Cache” or “Clear Data” within the app settings.
Step 6: Clear Font Cache
Font cache can also accumulate over time and impact system performance. To clear font cache on your MacBook, follow these steps:
- Open Terminal: Launch Terminal from the Utilities folder or using Spotlight.
- Enter Command: Type “sudo atsutil databases -remove” and press Enter.
- Enter Admin Password: You’ll be prompted to enter your admin password. Type it in and press Enter.
- Restart Your MacBook: After clearing the font cache, restart your MacBook to apply the changes.
Clearing cache on your MacBook is a simple yet effective way to boost performance and ensure smooth operation. By following the step-by-step guide outlined in this article, you can easily clear cache for different components of your system, including system cache, user cache, browser cache, app cache, and font cache. Make it a regular practice to clear cache periodically to keep your MacBook running at its best.
Remember, while clearing cache can improve performance, it’s just one aspect of maintaining a healthy MacBook. Regular software updates, disk cleanup, and other maintenance tasks are also essential for optimal performance and longevity of your device. Keep your MacBook refreshed and enjoy a seamless computing experience!
Additional Tips for Maximizing MacBook Performance

While clearing cache is a fundamental step in optimizing your MacBook’s performance, there are several other strategies you can implement to ensure your device operates at its peak efficiency. Let’s explore some additional tips and tricks to maximize MacBook performance:
Update macOS Regularly:
Apple regularly releases updates to macOS, which include performance improvements, bug fixes, and security enhancements. Keeping your operating system up to date ensures that you’re running the latest software with all the latest optimizations. To check for updates, go to the Apple menu > System Preferences > Software Update.
Manage Startup Items:
Over time, your MacBook may accumulate unnecessary startup items that slow down the boot process. Review the list of startup items in System Preferences > Users & Groups > Login Items and remove any applications that you don’t need to launch automatically at startup.
Declutter Your Desktop:
Having too many files and icons on your desktop can impact system performance, especially if they are resource-intensive files like high-resolution images or videos. Try to keep your desktop clean and organized by moving files to appropriate folders.
Optimize Storage Space:
Running low on disk space can significantly affect your MacBook’s performance. Use the built-in Storage Management tool (Apple menu > About This Mac > Storage) to identify and remove large or unnecessary files. You can also consider using external storage solutions or cloud services to offload files and free up space on your MacBook’s internal drive.
Manage Memory Usage:
If your MacBook frequently runs out of memory (RAM), it can lead to slow performance and system freezes. Use Activity Monitor (Applications > Utilities > Activity Monitor) to monitor memory usage and identify any memory-intensive processes. You can also consider upgrading your MacBook’s RAM if you frequently encounter performance issues due to insufficient memory.
Disable Visual Effects:
macOS includes various visual effects and animations that enhance the user interface but can also consume system resources. Disabling or reducing these visual effects can improve overall system responsiveness. Go to System Preferences > Accessibility > Display and enable “Reduce motion” to minimize animations.
Reset SMC and PRAM/NVRAM:
Resetting the System Management Controller (SMC) and Parameter RAM (PRAM) or Non-Volatile RAM (NVRAM) can sometimes resolve performance issues related to hardware and system settings. Instructions for resetting SMC and PRAM/NVRAM vary depending on the model of your MacBook, so consult Apple’s support documentation for guidance.
Monitor Temperature and Manage Heat:
Excessive heat can impact your MacBook’s performance and lifespan. Use temperature monitoring utilities like iStat Menus or Macs Fan Control to keep an eye on your MacBook’s temperature and adjust fan speeds if necessary. Additionally, avoid using your MacBook on soft surfaces that can obstruct airflow and cause overheating.
Use Energy Saver Settings:
Adjusting energy saver settings can help conserve battery life and optimize performance. Go to System Preferences > Energy Saver and adjust settings such as display sleep, computer sleep, and automatic graphics switching to balance performance and battery life according to your needs.
Perform Regular Maintenance:
In addition to clearing cache, regularly perform maintenance tasks such as disk cleanup, disk verification and repair, and system updates. Third-party utilities like CleanMyMac or OnyX can automate many of these tasks and help keep your MacBook running smoothly.
By implementing these additional tips and strategies, you can further enhance the performance and efficiency of your MacBook. Remember that maintaining optimal performance is an ongoing process that requires regular attention and care. By combining cache clearing with other maintenance tasks and optimization techniques, you can ensure that your MacBook continues to deliver the best possible performance for years to come. Keep exploring and experimenting with different methods to find the perfect balance that suits your workflow and computing needs.