
The Apple Pencil is a fantastic tool that turns your iPad into a digital canvas, notebook, or even a productivity powerhouse. Whether you’re an artist, student, or professional, pairing your Apple Pencil with your iPad is the first step to unlocking its full potential. If you’re unsure how to pair it—or which version of the Apple Pencil you have—this guide will walk you through every step clearly and thoroughly.
Pairing your Apple Pencil only takes a minute, but making sure you’re using the correct method for your model is key. Let’s get started.
Step 1: Identify Your Apple Pencil Model
Apple makes two versions of the Apple Pencil, and they each pair differently:
- Apple Pencil (1st Generation): This model has a removable cap and a Lightning connector underneath. It pairs by plugging directly into the iPad’s charging port.
- Apple Pencil (2nd Generation): This model is sleeker, has no cap or connector, and attaches magnetically to the side of your iPad to pair and charge.
If you’re not sure which one you have, here’s a quick way to tell:
- The 1st gen has a glossy, round body with a silver band near the top.
- The 2nd gen has a matte finish, flat edge, and no silver band or cap.
Step 2: Make Sure Your iPad Is Compatible
Before pairing, check that your iPad supports your Apple Pencil. Compatibility matters.
Apple Pencil (1st Gen) is compatible with:
- iPad (6th, 7th, 8th, and 9th generation)
- iPad mini (5th gen)
- iPad Air (3rd gen)
- iPad Pro 9.7″, 10.5″, 12.9″ (1st and 2nd gen)
Apple Pencil (2nd Gen) is compatible with:
- iPad Pro 11″ (1st gen and newer)
- iPad Pro 12.9″ (3rd gen and newer)
- iPad Air (4th gen and newer)
- iPad mini (6th gen)
Newer models like the iPad (10th gen) use a USB-C Apple Pencil, which connects differently—so always double-check your specific model.
Step 3: Pairing Your Apple Pencil
🖊 For Apple Pencil (1st Gen):
- Remove the cap from the back of the Pencil to expose the Lightning connector.
- Plug the Pencil into your iPad’s Lightning port.
- When prompted, tap “Pair” on the screen.
- Once paired, you can start using it right away.
🔋 Pro Tip: Let it charge for a few minutes after pairing to ensure you have enough battery for drawing or writing.
✏️ For Apple Pencil (2nd Gen):
- Attach the Pencil magnetically to the right side of your iPad (along the edge that supports charging).
- A pop-up will appear on the screen asking if you’d like to pair it.
- Tap “Pair.”
That’s it—your Pencil is now connected and charging wirelessly.
📌 Tip: If no pop-up appears, make sure Bluetooth is enabled and that your iPad model supports the 2nd gen Pencil.
Step 4: Check Battery and Connection
Once paired, you can easily check your Apple Pencil’s battery level:
- Swipe right from the home screen to view the Today View.
- Look for the Batteries widget. If you don’t see it, add it by:
- Scrolling to the bottom and tapping Edit
- Tapping the “+” next to Batteries
- Tapping Done
The Pencil’s battery level should now appear whenever it’s connected.
Step 5: Start Using It
Once your Apple Pencil is paired and charged, you can:
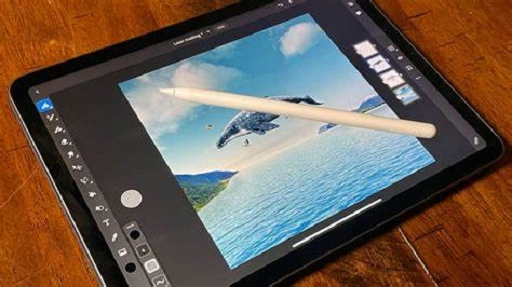
- Draw or sketch in apps like Procreate, Adobe Fresco, or Notes
- Annotate PDFs or screenshots
- Use Scribble to handwrite in text fields (iPadOS 14 and later)
- Tap twice (2nd gen only) to switch tools in supported apps
What to Do If Your Apple Pencil Won’t Pair
If your Apple Pencil doesn’t pair:
- Restart your iPad
- Make sure Bluetooth is turned on in Settings > Bluetooth
- For 1st Gen: Try plugging it in again, and ensure it’s fully inserted
- For 2nd Gen: Remove it from the magnetic strip, wait a few seconds, and reattach
- Charge your Pencil—low battery can prevent pairing
- Go to Settings > Bluetooth, find your Apple Pencil, tap the “i”, and Forget This Device. Then try pairing again.
If all else fails, update your iPad’s software or contact Apple Support to check for hardware issues.
Unpairing or Switching iPads
Apple Pencils automatically unpair when paired with a different iPad. If you want to switch to a new iPad:
- Connect or attach the Pencil to the new device
- Follow the same pairing steps
- The previous iPad will no longer be connected
You can also manually unpair it by going to Settings > Bluetooth, tapping the “i” next to the Pencil, and choosing Forget This Device.
Final Thoughts
Pairing your Apple Pencil with your iPad is simple, but only if you know the right steps—and use the correct model. Whether you’re creating art, annotating documents, or just jotting down notes, the Apple Pencil brings a whole new level of functionality and finesse to your iPad experience.
Make sure your iPad and Pencil are compatible, follow the quick pairing steps, and you’ll be sketching, writing, or designing in no time.