
The Apple Pencil is a powerful tool that enhances the functionality of your iPad, allowing you to unleash your creativity and productivity in new and exciting ways. Whether you’re an artist, designer, student, or professional, the Apple Pencil offers precision, responsiveness, and versatility for a wide range of tasks. However, before you can start using your Apple Pencil to its full potential, you need to know how to turn it on and get it ready for action. In this comprehensive guide, we’ll walk you through the step-by-step process of turning on your Apple Pencil and getting started with your creative journey.
Understanding the Apple Pencil
Before we delve into the specifics of turning on the Apple Pencil, let’s take a moment to understand what it is and how it works. The Apple Pencil is a stylus designed specifically for use with compatible iPad models, including iPad Pro, iPad Air, and iPad mini. Equipped with advanced sensors and pressure sensitivity, the Apple Pencil delivers a natural and immersive drawing experience, allowing you to sketch, annotate, and create with precision and accuracy.
Compatibility:
Before purchasing an Apple Pencil, it’s essential to ensure compatibility with your iPad model. As of [current year], the following iPad models are compatible with the Apple Pencil:
- iPad Pro (all models)
- iPad Air (3rd generation and later)
- iPad mini (5th generation and later)
If you own one of these iPad models, you can use the Apple Pencil to unleash your creativity and productivity on your device.
Charging the Apple Pencil
Before you can turn on your Apple Pencil, you’ll need to ensure that it’s charged and ready for use. The Apple Pencil features a built-in rechargeable battery that can be charged using the following methods:
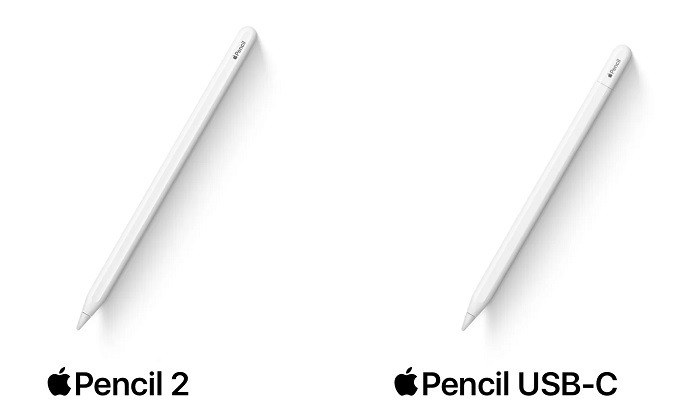
- Wireless Charging: If you own an Apple Pencil (2nd generation), you can charge it wirelessly by attaching it magnetically to the side of your iPad Pro. The iPad will automatically detect the Apple Pencil and begin charging it wirelessly.
- USB-C Connector: If you own an Apple Pencil (1st generation), you can charge it using the included Lightning adapter and a standard USB-C to Lightning cable. Simply plug the Lightning adapter into the charging port of your Apple Pencil, then connect the Lightning cable to a USB-C power source, such as an iPad charger or a USB-C port on your computer.
Once your Apple Pencil is fully charged, you’re ready to turn it on and start using it with your iPad.
Turning On the Apple Pencil
Now that your Apple Pencil is charged, let’s walk through the steps to turn it on and pair it with your iPad:
- Remove the Cap: If your Apple Pencil has a cap on the end opposite the tip, remove it by gently pulling it off.
- Plug in the Apple Pencil: For the Apple Pencil (1st generation), plug the Lightning connector into the Lightning port of your iPad. For the Apple Pencil (2nd generation), simply attach it magnetically to the side of your iPad Pro.
- Pairing Process: Once connected, your iPad will automatically detect the Apple Pencil and prompt you to pair it. Follow the on-screen instructions to complete the pairing process.
- Check Battery Status: After pairing, you can check the battery status of your Apple Pencil by swiping down from the top-right corner of your iPad’s screen to access Control Center. Look for the Apple Pencil icon to view its battery percentage.
Using the Apple Pencil
With your Apple Pencil turned on and paired with your iPad, you’re ready to start using it for a variety of tasks, including:
- Drawing and sketching
- Taking handwritten notes
- Annotating documents and PDFs
- Editing photos and videos
- Navigating your iPad’s interface with precision
Experiment with different apps and explore the full range of capabilities that the Apple Pencil has to offer. Whether you’re an artist, student, or professional, the Apple Pencil can help you unleash your creativity and productivity like never before.
Additional Tips and Tricks
Here are some additional tips and tricks to help you get the most out of your Apple Pencil experience:
- Adjust Settings: Explore the settings menu on your iPad to customize the behavior and sensitivity of your Apple Pencil. You can adjust settings such as double-tap functionality, palm rejection, and pressure sensitivity to suit your preferences.
- Use Accessories: Consider investing in accessories such as screen protectors and carrying cases to protect your iPad and Apple Pencil from scratches, dust, and damage. There are also accessories available, such as pencil grips and magnetic sleeves, that can enhance your grip and make using the Apple Pencil more comfortable.
- Practice Regularly: Like any tool, the Apple Pencil requires practice to master. Set aside time each day to practice drawing, writing, and exploring different techniques with your Apple Pencil. With consistent practice, you’ll become more comfortable and proficient with using the Apple Pencil for a variety of tasks.
- Stay Updated: Keep your iPad and Apple Pencil up to date with the latest software updates from Apple. These updates may include performance improvements, new features, and bug fixes that enhance the functionality and reliability of your Apple Pencil.
Related Post:
Troubleshooting Guide: What to Do When Your Apple Watch Won’t Charge
Exploring the Next Generation: Unveiling the Apple M2 Chip
Exploring the Concept and Implications of Apple Teleport
Turning on and pairing your Apple Pencil with your iPad is a simple and straightforward process that unlocks a world of creative possibilities. Whether you’re a professional artist, student, or casual doodler, the Apple Pencil offers precision, responsiveness, and versatility for a wide range of tasks. By following the steps outlined in this guide and exploring the tips and tricks provided, you can make the most of your Apple Pencil experience and unleash your creativity in new and exciting ways. So grab your Apple Pencil, fire up your iPad, and start creating masterpieces today!