Knowing how to backup a MacBook to iCloud is essential in 2025. Whether you’re protecting your work files, photos, or settings, iCloud provides a secure and convenient solution for data storage. If you accidentally delete a file, upgrade to a new Mac, or experience a crash, having an iCloud backup can be a lifesaver.
This guide will walk you through every step to backup your MacBook to iCloud correctly and make sure your important data is always protected.
Why iCloud Is a Smart Backup Solution for MacBook Users

iCloud offers Apple users a simple, built-in cloud storage system. With iCloud, you can store and sync files across all your devices, including MacBook, iPhone, and iPad. It automatically saves documents, settings, photos, app data, and even Safari bookmarks.
Some of the key benefits of iCloud backups include:
- Access your files anywhere
- Seamless syncing with other Apple devices
- Automatic backup of key data like Contacts, Notes, and Calendar
- Encryption for extra privacy and protection
If you’re using a MacBook in 2025, learning how to backup to iCloud is a must for productivity and peace of mind.
iCloud Storage Plans in 2025
Before setting up your MacBook backup, it’s important to understand your iCloud storage options. Apple offers several plans:
- 5 GB: Free, but usually not enough for full Mac backups
- 50 GB: Ideal for light users ($0.99/month)
- 200 GB: Great for individuals with multiple Apple devices ($2.99/month)
- 2 TB: Perfect for families and professionals ($9.99/month)
Choose a plan that fits your needs before you begin the backup process.
Step 1: Sign In to iCloud on Your MacBook
To start backing up your MacBook to iCloud, you need to be signed in with your Apple ID.
- Click the Apple menu in the top-left corner
- Open System Settings (or System Preferences on older macOS versions)
- Select your Apple ID
- Make sure you are signed in
If you don’t have an Apple ID, you’ll need to create one. This ID will link all your devices to the same iCloud account for synchronized backups.
Step 2: Enable iCloud Drive
iCloud Drive is where your files will be stored and synced across devices.
- Go to System Settings
- Click on your Apple ID
- Select “iCloud”
- Turn on “iCloud Drive”
Make sure “Desktop & Documents Folders” is also enabled so your MacBook’s main work areas are included in the backup.
Step 3: Choose What to Back Up
Not everything on your MacBook is automatically backed up. You can customize which apps and services use iCloud.
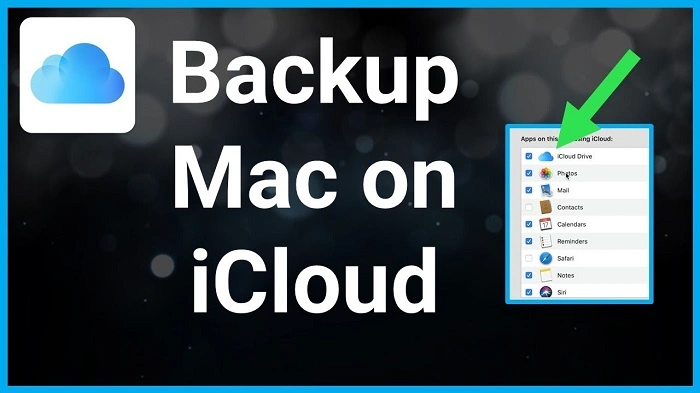
- In the same iCloud settings, scroll through the list of apps
- Toggle on or off the services you want to sync:
- Photos
- Notes
- Calendars
- Reminders
- Safari
- Contacts
- Messages
This allows you to manage storage space more effectively while still backing up your most important data.
Step 4: Back Up Photos and Videos
If you have a large photo library, enable iCloud Photos to keep everything safely stored in the cloud.
- Open Photos app
- Go to Settings (or Preferences)
- Click on “iCloud”
- Enable “iCloud Photos”
Now your images and videos will upload to iCloud and sync with your iPhone, iPad, and other Apple devices.
Step 5: Use iCloud Keychain for Passwords
To ensure your passwords and credit card information are backed up:
- Open System Settings
- Click “Passwords”
- Enable “iCloud Keychain”
This stores your Safari autofill data and passwords securely, helping you log in easily across devices.
Step 6: Sync Safari Data and Bookmarks
iCloud can back up your open tabs, browsing history, and bookmarks.
- Go to System Settings > Apple ID > iCloud
- Turn on Safari syncing
This is useful if you switch between Mac and iPhone regularly and want a seamless web experience.
Step 7: Monitor Your iCloud Storage Usage
Over time, your storage may fill up. You can check available space and manage it from your Mac.
- Open System Settings
- Go to Apple ID > iCloud
- Click “Manage” to see what’s taking up space
You can upgrade your storage plan or delete older backups as needed.
Step 8: Set Up Time Machine with iCloud (Optional via iCloud Drive)
While Time Machine doesn’t back up directly to iCloud, you can manually move Time Machine snapshots or folders to iCloud Drive for extra protection.
Simply drag backup folders into iCloud Drive or save important documents in folders that sync automatically.
What iCloud Doesn’t Back Up Automatically

It’s important to know that iCloud does not automatically back up:
- System files or macOS installations
- Installed applications
- External drives
For complete system backups, consider using Time Machine with an external hard drive in addition to iCloud.
When You Should Back Up to iCloud
- Before macOS updates or upgrades
- Before selling, trading, or resetting your MacBook
- After major file changes or app installations
- On a regular schedule for peace of mind
iCloud is best for frequent, passive backups of essential data—not full system images.
FAQs About How to Backup MacBook to iCloud
Can I back up my entire MacBook to iCloud?
No. iCloud is designed to sync and back up files, settings, and app data—not the entire macOS system. Use Time Machine for full backups.
How much iCloud storage do I need for my MacBook backup?
Most users need at least 200 GB to comfortably back up documents, photos, and app data. 2 TB is ideal for larger files or multiple devices.
Does iCloud automatically back up my Mac?
Yes, but only for selected files and services like iCloud Drive, Photos, Notes, and Safari. You must enable each option manually.
Can I restore data from iCloud if I reset my MacBook?
Yes. During setup, you’ll have the option to restore from iCloud. This includes synced files, settings, and app data.
How do I know if my MacBook is backed up to iCloud?
Go to System Settings > Apple ID > iCloud > iCloud Drive. If enabled, your data is being synced. You can also check storage usage.

