
With the latest MacBook Air M1 and M2 models, people often find it too difficult to connect to other devices. That’s because there are only two USB Type-C ports and an additional MagSafe 3 port for charging if you go with the M2 model.
So, if you are thinking about how to connect the ethernet cable to MacBook Air M1 or M2, you have come to the right place.
It’s entirely possible, and let me show you how I did it with my MacBook Air.
To connect an Ethernet Cable to a MacBook Pro or Air, consider buying an Ethernet Adapter. Put your ethernet cable into the Adapter. This adapter will have the USB Type C on the other end. Now, you can put the USB Type C into your MacBook Air. Ta-da, the ethernet is ready to work with your MacBook Pro or MacBook Air.
Can You Really Connect Ethernet Cable To MacBook Air M1 or M2?
Even though there is no room for Ethernet Cable to be inside your MacBook air latest model, you can still connect it.
There are a number of possibilities to do this job, but for that, you will have to purchase the right connectivity devices.
Whether you have MacBook Air M1 or M2 now or MacBook Pro M1 or M2, there are no dedicated ports assigned for letting you connect the Ethernet Cable or any other cable other than having a USB Type C connectivity.
But I’ll show you how it gets done!
Step-by-Step Process to Connect Ethernet Cable with MacBook Air or Pro:
There won’t be any hard and fast rules to follow when it comes to officially making an ethernet connection with your MacBook.
However, if you are an ammeter and need much help, here are some easy steps to figure this out. Have a look, please.
Step 1: Configure Your MacBook Air Ports:
Eventually, if you are using one of the latest MacBook Air models, you will find exactly similar types of ports with each MacBook.
Regardless of whether you have MacBook Air or MacBook Pro with M1 and M2 chips, there will be ports like Thunderbolt / USB 4, 3.5 mm headphone jack, and MagSafe 3.
Pro Tip: We are not solving this query for MacBooks older than 2020 models. So, figure that out appropriately!
Step 2: Buy a High-Quality Thunderbolt Ethernet Adapter:
In this step, you need to spend some money and buy a good quality Ethernet Adapter.
We understand the fact that there are a number of Thunderbolt Adapters out there in the market.
But you need to choose the best one. In that case, I’ve made that part easier for you.
If you love Apple Products, consider buying a Thunderbolt to Gigabit Ethernet Adapter.
This one is pretty good and designed only to connect your Ethernet cable with the MacBook Air or Pro.
Or if you need an Ethernet Adapter with some more options as well, you can consider buying a TOTU 11-in-1 Adapter with Ethernet Connectivity.
With these adapters, you can easily connect your Ethernet Cable to the MacBook and run the internet on the device.
Step 3: Connect the Ethernet Cable With MacBook Air:
In the final step, you finally need to connect your Ethernet Cable to the MacBook Air.
This is done when you put the Ethernet cable into the ethernet port of the adapter.
Once connected there, take the USB Type C side of the same adapter and connect it to your MacBook Air or Pro M1 and M2.
So, this is how you will connect your Ethernet with the MacBook Air or MacBook Pro machine. There is no problem configuring a problem like this!
What To Do if the Internet Does Not Work After Connecting MacBook To Ethernet Cable?
Mostly, the internet will start working automatically once you have connected your Ethernet Cable to the MacBook Air.
But if it doesn’t happen in your case, here are some easy things you can do.
On that MacBook Air of yours, clock on the Apple Menu icon and then go to System Settings.
Once there, you need to look for the Network option on the sidebar.
Sometimes, it requires scrolling. Once there, click the Network Option and find the appropriate window.
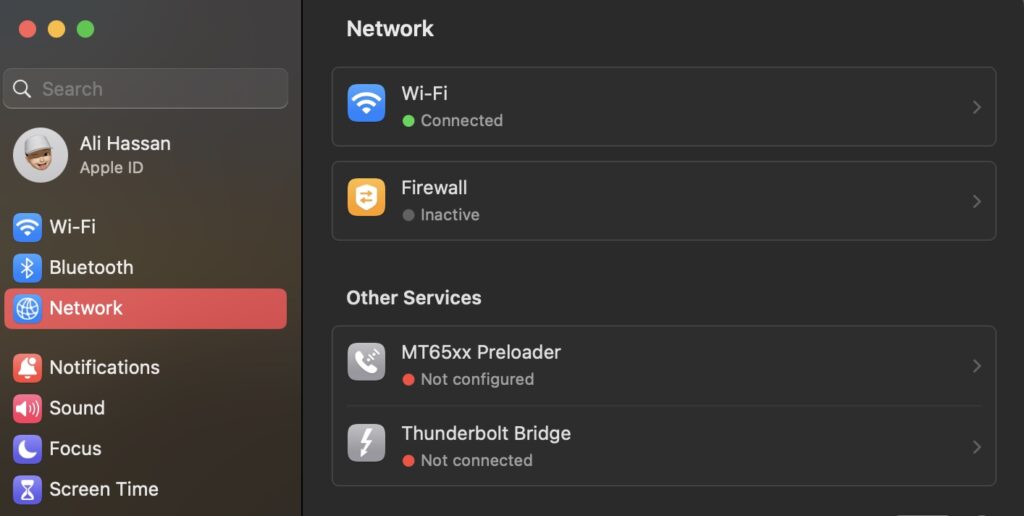
Once you are there, you need to click on the right side and find the Ethernet Service.
There, go to the Advance menu. But I believe that these settings would be a bit different if you were using the latest MacBook Pro or MacBook Air M1 and M2 models.
Here, you can also turn on or off to limit the IP Address tracking.
Next, click the TCP/IP in the sidebar and then figure out the section of the Configure IPv4 pop-up Menu.
After this, you need to choose one of the most recommended ISP configuration methods to make the internet run on your computer.
In the below table, you will find some ISPs’ internet methods to use with their appropriate settings. Have a look!
| Methods From ISPs | Related Settings |
| Using DHCP | For automatic IP Addresses from ISPs |
| Using DHCP with manual address | Using DHCP with a manual address |
| Manually | This includes entering that specific IP address, Subnet Mask, and Router address. |
This way, you will be able to fix the internet not working problem even if you have connected the ethernet cable recently to your MacBook Air.
How To Connect Both An External Monitor And Ethernet Cable To Macbook Air?
To supercharge your MacBook Air, first, grab a USB-C hub with HDMI and Ethernet ports.
Plug the hub into your MacBook’s USB-C port.
Connect the external monitor using the HDMI cable. For Ethernet, use another cable to link the hub to your router.
Your MacBook will detect the monitor automatically. To ensure a solid Ethernet connection, check your network settings.
Boom! You’ve expanded your MacBook Air’s capabilities with a bigger display and reliable wired internet.
How To Connect Air Capusle Vi Ethernet Cable To MacBook?
Transform your Air Capsule into a networking powerhouse.
Find an Ethernet cable and connect one end to your Air Capsule’s WAN port. The other end? Into your MacBook’s USB-C hub or Thunderbolt dock.
Open your MacBook’s Network preferences, select Ethernet, and voila – seamless wired connectivity!
Now, your Air Capsule becomes a hub for a speedy and stable internet connection, ensuring your MacBook stays connected without a hitch.
How To Connect Macbook Air Via Ethernet To Cable Modem?
Seeking a high-speed, stable connection? Grab an Ethernet cable and plug one end into your MacBook Air. The other end?
Directly into your cable modem. Head to System Preferences, click Network, and select Ethernet. Simple, right?
Your MacBook Air is now riding the internet express, ensuring a reliable and swift connection.
Say goodbye to lag and hello to seamless browsing, downloads, and video streaming.
How To Connect My Macbook Air Via Ethernet Cable?
Wired excellence awaits! Snag an Ethernet cable – one end goes into your MacBook Air’s Thunderbolt or USB-C port.
The other end?
Straight into your router or a switch.
Open System Preferences, hit Network, and select Ethernet. Enjoy the benefits of a stable and fast internet connection.
Whether you’re working on projects, streaming, or gaming, the wired route ensures your MacBook Air stays connected without missing a beat.
It’s the key to unlocking a world of seamless online experiences.
Frequently Asked Questions:
How To Connect Mac To Ethernet Using Thunderbolt?
When using Thunderbolt, put the Ethernet Cable into the Thunderbolt Ethernet adapter and then use that adapter’s USB-C cable to plug into your MacBook. This way, you will be able to connect your MacBook to the ethernet without facing any problems.
Does the MacBook Ethernet Port Come in the MacBook Air or Pro Latest Models?
No, you won’t find any Ethernet port in the MacBook Air or Pro models with M1 and M2 chips. That’s because these are only equipped with the USB Type C ports, and there is no ethernet port to find because of these laptop’s sleekest bodies.
What To Do if MacBook Not Connecting To Ethernet?
If your MacBook is not connecting to Ethernet, consider buying any other adapter. Or you could check if you are using the right information provided by your ISP. This way, it would be much easier for you to configure the not connecting problem of MacBook with ethernet!
Is It Worth To Buy a MacBook Ethernet Adapter?
Yes, with the latest MacBook Air M1 or M1 models, you should have an Ethernet or all-in-one adapter to expand the needs of your connectivity. This way, you can allow your laptop to accept multiple devices at one time through the same connectivity device. This is how you will be able to share and transfer data seamlessly.
Wrapping It Up:
No matter what you do, you need to have an Ethernet Adapter to connect the Ethernet Cable to a MacBook Air. It comes at a very reasonable price, and anyone can have it. Once you get it, try connecting your MacBook Air to the ethernet and enjoy the faster and lag-free internet without compromising anything. But don’t forget to comment if you have any problems to face while completing this connectivity task.