
Is your old MacBook feeling sluggish and unresponsive? Does it struggle to keep up with your tasks, leaving you frustrated and wondering if it’s time for an upgrade? Before you invest in a new device, consider giving your old MacBook a fresh start with a factory reset. In this guide, we’ll walk you through the process step by step, helping you breathe new life into your beloved device.
Why Factory Reset Your MacBook?
Before we delve into the how-to of factory resetting your MacBook, let’s explore why you might want to take this step.
Signs Your MacBook Needs a Reset
Over time, your MacBook can accumulate clutter, temporary files, and outdated software that can slow down its performance. Here are some signs that indicate it might be time for a factory reset:
- Sluggish Performance: If your MacBook is taking longer than usual to boot up, launch applications, or respond to commands, it could be a sign of underlying issues that a reset can resolve.
- Frequent Crashes: Random crashes, freezes, or the dreaded spinning beach ball of death can be symptoms of software conflicts or corruption.
- Storage Space Running Low: If you’re constantly receiving notifications about low disk space despite deleting files, a reset can help reclaim lost storage by removing unnecessary data.
- Software Errors: Persistent software errors or glitches that don’t seem to go away, even after troubleshooting, may require a more drastic solution like a factory reset.
Preparing Your MacBook for Reset
Before initiating a factory reset, it’s crucial to take some preparatory steps to ensure a smooth process and prevent data loss.
Back Up Your Data
A factory reset will erase all data on your MacBook, so it’s essential to back up any important files or documents beforehand. You can use Time Machine, Apple’s built-in backup solution, or manually transfer files to an external hard drive or cloud storage service like iCloud or Dropbox.
Sign Out of iCloud and Deauthorize iTunes
To avoid any complications with iCloud syncing or iTunes authorization after the reset, sign out of your iCloud account and deauthorize iTunes on your MacBook. This will prevent any issues with accessing your content or services post-reset.
Gather Installation Media and Product Keys
If your MacBook shipped with installation media, such as a macOS installation disk or USB drive, locate it before proceeding with the reset. Additionally, make sure you have any necessary product keys or licenses for software you’ll need to reinstall after the reset.
Performing the Factory Reset
With your data backed up and preparations complete, you’re ready to initiate the factory reset process. Follow these steps carefully to restore your MacBook to its original state:
Shut Down Your MacBook
Begin by shutting down your MacBook completely. You can do this by selecting “Shut Down” from the Apple menu or pressing and holding the power button until the shutdown process initiates.
Boot into Recovery Mode
Next, you’ll need to boot your MacBook into Recovery Mode. To do this, press and hold the Command (⌘) and R keys simultaneously while pressing the power button to turn on your MacBook. Continue holding the keys until the Apple logo appears, indicating that your MacBook is booting into Recovery Mode.
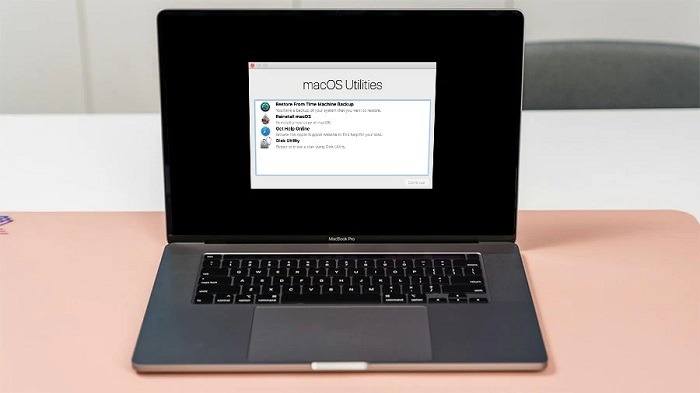
Access Disk Utility
Once your MacBook has booted into Recovery Mode, you’ll be presented with several options. Select “Disk Utility” from the list and click Continue. Disk Utility is a built-in macOS utility that allows you to manage and repair your disk partitions.
Erase the Startup Disk
In Disk Utility, locate your MacBook’s startup disk (usually named “Macintosh HD” or something similar) in the sidebar. Select the disk, then click the “Erase” button at the top of the window.
Step 5: Choose a File System and Name
In the Erase dialog box, choose a file system format for your disk. For most users, the default option of “Mac OS Extended (Journaled)” is suitable. You can also enter a name for your disk if desired.
Erase and Confirm
Once you’ve selected the desired file system and disk name, click the “Erase” button to begin the erasure process. Disk Utility will warn you that erasing the disk will delete all data stored on it. Confirm your decision by clicking “Erase” again.
Reinstall macOS
After erasing the startup disk, close Disk Utility to return to the main Recovery Mode menu. From here, select “Reinstall macOS” and follow the on-screen instructions to download and reinstall the macOS operating system on your MacBook.
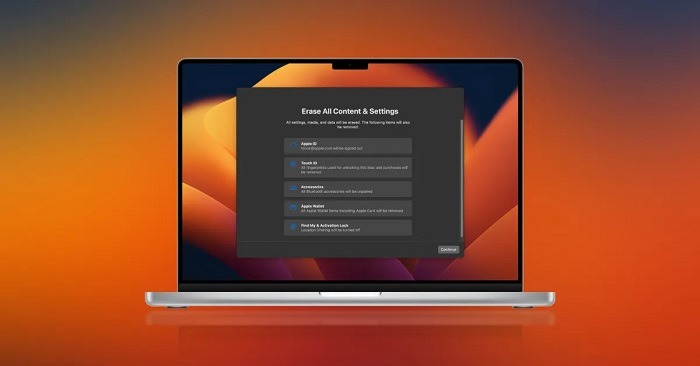
Set Up Your MacBook
Once macOS has been successfully reinstalled, your MacBook will restart and prompt you to set up the operating system as if it were a new device. Follow the setup process, including selecting your language, region, Wi-Fi network, and creating a user account.
Restoring Your Data
After completing the factory reset and setting up your MacBook, you can restore your backed-up data from Time Machine or external storage. Follow these steps to restore your files:
Connect Your Backup Drive
Connect your Time Machine backup drive or external storage device containing your backed-up data to your MacBook.
Open Migration Assistant
Launch Migration Assistant, which can be found in the Utilities folder within the Applications folder. Migration Assistant will guide you through the process of transferring your files from the backup to your MacBook.
Select Transfer Method
Choose the option to transfer data from a Time Machine backup or external disk, depending on where your data is stored.
Select Backup Source
Select your Time Machine backup drive or external storage device as the source of the transfer.
Choose Data to Transfer
Select the data you want to transfer to your MacBook, such as user accounts, applications, and files.
Begin Transfer
Initiate the transfer process and allow Migration Assistant to copy your selected data to your MacBook. The time it takes to complete the transfer will depend on the amount of data being transferred and the speed of your backup drive or external storage.
Complete Setup
Once the transfer is complete, you can continue with the setup process and begin using your MacBook with your restored data.
A factory reset can breathe new life into your old MacBook, restoring its performance and functionality to like-new condition. By following the steps outlined in this guide and taking proper precautions to back up your data, you can confidently reset your MacBook and enjoy a fresh start with your device. Remember to reinstall any necessary software and restore your backed-up data to ensure a seamless transition. With your MacBook reset and rejuvenated, you can continue to enjoy its performance for years to come.
Further Tips for Optimizing Performance
While a factory reset can significantly improve the performance of your old MacBook, there are additional steps you can take to optimize its performance and ensure smooth operation.
Update macOS and Software
After completing the factory reset and reinstalling macOS, make sure to check for any available updates. Keeping your operating system and software up to date ensures that you have the latest security patches, bug fixes, and performance improvements. You can check for updates by clicking on the Apple menu and selecting “Software Update.”
Manage Startup Items
Over time, your MacBook may accumulate unnecessary startup items that slow down the boot process. Review the list of startup items in System Preferences > Users & Groups > Login Items and remove any applications that you don’t need to launch automatically at startup. This can help reduce the time it takes for your MacBook to boot up and improve overall performance.
Declutter Your Hard Drive
A cluttered hard drive can impact your MacBook’s performance, so it’s essential to regularly declutter and organize your files. Use Finder to identify and delete any unnecessary files, old documents, or unused applications taking up space on your hard drive. You can also use third-party disk cleanup utilities to help identify and remove large or duplicate files.
Optimize Storage with iCloud
If your MacBook’s storage space is limited, consider using iCloud to optimize storage. iCloud Drive allows you to store files, photos, and documents in the cloud, freeing up space on your MacBook’s hard drive. You can enable iCloud Drive in System Preferences > Apple ID > iCloud and select the options to optimize storage and sync your files with iCloud.
Monitor Activity Monitor
Activity Monitor is a built-in macOS utility that allows you to monitor system performance and identify resource-intensive processes. Use Activity Monitor to keep an eye on CPU, memory, disk, and network usage, and identify any applications or processes that are consuming excessive resources. You can force quit or uninstall resource-hungry applications to improve overall system performance.
Enable Trim for SSD
If your MacBook is equipped with a solid-state drive (SSD), enabling Trim can help maintain optimal SSD performance and longevity. Trim is a feature that allows the operating system to inform the SSD which data blocks are no longer in use and can be erased. You can enable Trim using third-party utilities like Trim Enabler or by using Terminal commands.
Reset PRAM and SMC
Resetting the Parameter RAM (PRAM) and System Management Controller (SMC) can help resolve various issues and improve overall system stability. To reset PRAM, restart your MacBook and immediately press and hold the Option, Command, P, and R keys simultaneously until you hear the startup chime a second time. To reset SMC, shut down your MacBook, then press and hold the Shift, Control, Option, and power keys simultaneously for 10 seconds before releasing them.
Consider Hardware Upgrades
If your MacBook is still struggling with performance issues after a factory reset and optimization efforts, it may be time to consider hardware upgrades. Depending on the model and configuration of your MacBook, you may be able to upgrade components such as RAM and storage to improve performance. Consult Apple’s support website or visit an authorized service provider for information on compatible upgrade options for your specific MacBook model.
Related Post:
Unveiling the Sleek Elegance: The Space Gray MacBook Air Experience
Mastering the Mac: A Step-by-Step Guide to Factory Resetting Your MacBook Air 2015
Mastering the Art of Restart: Your Ultimate Guide to Reviving Your MacBook Air
By following these additional tips for optimizing performance, you can further enhance the performance and longevity of your old MacBook. From updating software and managing startup items to monitoring system activity and considering hardware upgrades, there are various steps you can take to ensure that your MacBook continues to serve you well for years to come. With a combination of software tweaks and hardware enhancements, you can breathe new life into your old MacBook and enjoy improved performance and productivity.