
Roblox has evolved into one of the most popular platforms for creating and sharing games, and its robust customization options allow players to express themselves like never before. One such customization option is creating unique shirts using the Roblox shirt template. This guide will walk you through the entire process of using a Roblox shirt template, from the basics to advanced design tips, and even how to upload your creation to the Roblox platform.
What is a Roblox Shirt Template?
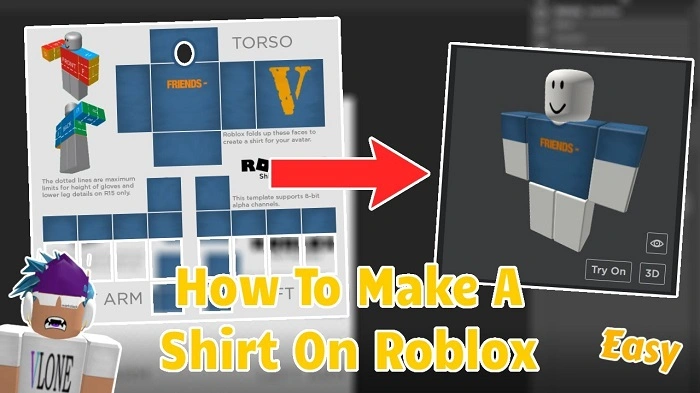
A Roblox shirt template is a pre-designed image file that helps you create custom shirts for your Roblox avatar. These templates provide a structure, outlining where certain parts of the shirt, such as the front, back, sleeves, and collar, will appear when viewed on the character. By utilizing these templates, you can design shirts that are truly one-of-a-kind, adding a personal touch to your gaming experience.
The shirt template is typically a 512×512 pixel image file with different sections that allow you to design various parts of a shirt. Once you’ve created your design, you can upload it to Roblox and make it available for other players to wear.
How to Use a Roblox Shirt Template
Step 1: Getting the Template
Before you can start designing your Roblox shirt, you’ll need the official template. Here’s how you can obtain it:
Go to the Roblox website.
Navigate to the Create page.
Under the Shirts section, you will find a link to download the Roblox shirt template.
The template is a transparent PNG image that contains several marked sections. These sections are labeled so you can understand which part corresponds to the front, back, and sleeves of the shirt.
Step 2: Designing Your Shirt
Once you have the template, it’s time to unleash your creativity. You can use any image editing software that supports layers, transparency, and PNG files. Here’s a step-by-step guide on how to design your shirt:
Open the Template in an Image Editor
Open the downloaded template in your preferred image editing program, such as Photoshop, GIMP, or even simpler options like Paint.NET. The template will provide a grid with labeled sections for the front, back, and sleeves of the shirt.
Add Your Design
Using the available sections, you can add your custom designs. You can draw, add images, or create patterns within these areas. Make sure that the design aligns with the shirt’s sections to avoid distortion when it is worn by the character in Roblox.
Consider Shirt Fit and Placement
Pay attention to the proportions of your design to ensure it fits well on the character’s avatar. It’s essential to remember that your shirt design will wrap around the avatar’s torso and arms. Try to design around this 3D space to avoid having parts of the shirt stretch awkwardly.
Save Your File
Once you’re happy with your design, save it as a PNG file to preserve transparency. Avoid using other formats like JPEG, as they don’t support transparent backgrounds, which is vital for a clean look on your Roblox avatar.
Step 3: Uploading the Shirt to Roblox
After designing your shirt, the next step is to upload it to Roblox. Here’s how to do it:
Navigate to the Create section on Roblox.
Select Shirts from the menu.
Click on the Choose File button and select your PNG shirt file.
Give your shirt a name and description.
Hit the Upload button.
Once your shirt is uploaded, it will be processed by Roblox, and you will be able to see how it looks on your avatar.
Tips for Designing the Perfect Roblox Shirt
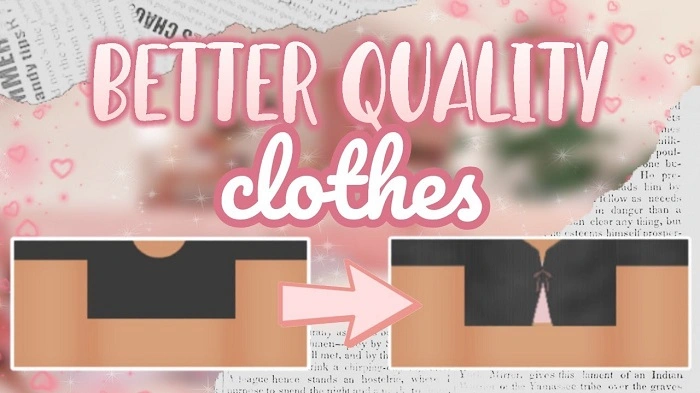
Use High-Quality Graphics
When designing your shirt, always use high-quality graphics and vectors. This will ensure that your shirt looks crisp and clear, even when it’s resized or viewed on different devices.
Be Mindful of the Shirt Sections
The template is divided into various sections: the front, back, sleeves, and the bottom. Ensure that your designs are well-placed within these boundaries, as stretching or misplacing designs can result in a poor fit when worn by the avatar.
Experiment with Patterns and Colors
You can create simple designs or go all out with intricate patterns. Don’t be afraid to experiment with bold colors or even gradients to make your shirt stand out. Keep in mind that a good contrast can help your design pop on the avatar.
Avoid Overcomplicating the Design
While it’s tempting to create a complex design, keep in mind that simplicity is often more effective. A clean, well-thought-out design is more likely to be appreciated by other Roblox users.
Check for Alignment
Before uploading your design, make sure that all elements align correctly. It’s a good idea to view the shirt on an avatar model to ensure that the design fits and looks natural in all areas.
How to Make Your Shirt Stand Out in Roblox
Once you’ve uploaded your shirt, you might wonder how to get noticed. Here are some strategies to help you:
Market Your Shirt: Share your shirt on social media platforms like Twitter, Instagram, or Roblox groups to attract more buyers and players.
Offer Limited Editions: Create exclusive shirts with a limited number of copies. This can drive demand and increase the appeal of your designs.
Use Roblox’s Avatar Shop: You can sell your shirts in the Avatar Shop for Roblox players to purchase. Make sure to price them reasonably and offer unique designs.
Frequently Asked Questions
What software can I use to design a Roblox shirt?
You can use any image editor like Photoshop, GIMP, Paint.NET, or even Canva to design your Roblox shirt. Just ensure that your software supports transparent PNG files.
Can I use copyrighted images in my Roblox shirt design?
No, you should avoid using copyrighted images unless you have permission. Roblox has strict rules about intellectual property, and violating them can lead to your designs being taken down.
How can I see how my shirt will look on my avatar?
Once you upload your design, you can preview it by applying it to your avatar in the Roblox profile section. This gives you an idea of how it will look in the game.
Can I sell my shirts on Roblox?
Yes, you can sell your shirts in the Avatar Shop. When you upload your shirt, you can set a price for other players to purchase it.
Are there any size restrictions for Roblox shirt templates?
The recommended size for the Roblox shirt template is 512×512 pixels. Any larger sizes might not display correctly, so it’s best to stick to the default size.
Creating a Roblox shirt template design is an exciting and creative way to customize your avatar on the platform. By following the steps outlined in this guide, you can design, upload, and even sell your shirts, enhancing your Roblox experience and letting your creativity shine. With a little practice and attention to detail, you can become a master of Roblox shirt design and create designs that other players will love.