
In the digital age, storage space is paramount. Whether you’re a student, professional, or casual user, managing your MacBook Air’s storage effectively is essential for optimal performance and productivity. With the myriad of files, apps, and media we accumulate, it’s easy for our storage space to dwindle without us even realizing it. In this comprehensive guide, we’ll delve into the depths of your MacBook Air’s storage, exploring how to check it effectively, and providing expert tips on how to optimize and manage your storage space efficiently.
Understanding Your MacBook Air’s Storage
Before we dive into the intricacies of storage management, let’s first understand the basics of storage on your MacBook Air. Unlike traditional hard drives, MacBook Airs typically come equipped with solid-state drives (SSDs), which offer faster performance and better energy efficiency. However, SSDs also come with limited storage capacity compared to their HDD counterparts.
The Importance of Regular Storage Checks
Regularly checking your MacBook Air’s storage is crucial for several reasons. Firstly, it allows you to identify any unnecessary files or applications that may be taking up valuable space. Secondly, it enables you to monitor your storage usage over time, helping you anticipate and prevent potential storage-related issues before they arise. Finally, by staying vigilant with storage checks, you can ensure your MacBook Air maintains optimal performance and responsiveness.
How to Check Storage on MacBook Air
Checking your MacBook Air’s storage is a straightforward process that can be done using built-in tools provided by macOS. Follow these steps to check your storage:
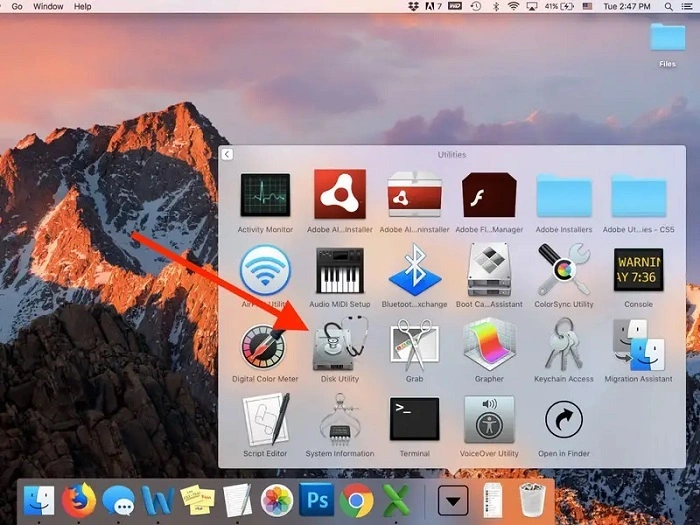
- Click on the Apple Menu: Located in the top-left corner of your screen, click on the Apple logo to open the drop-down menu.
- Select “About This Mac”: From the drop-down menu, select “About This Mac” to open a new window.
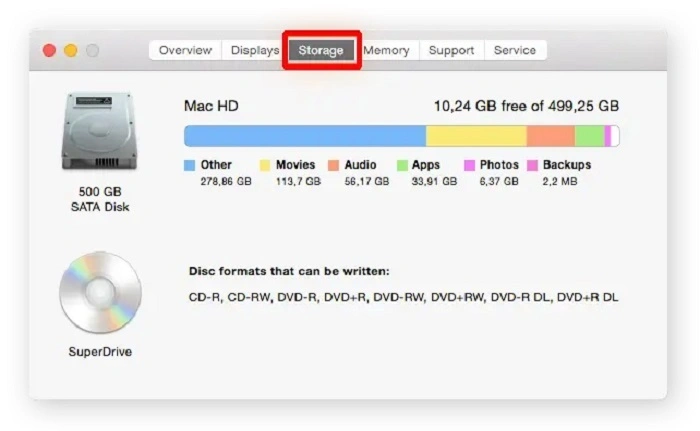
- Navigate to “Storage” Tab: In the window that appears, click on the “Storage” tab to view a breakdown of your MacBook Air’s storage usage.
- Analyze Storage Breakdown: Review the storage breakdown to see how much space is being used by various categories such as Applications, Documents, System, and Others.
Interpreting Storage Usage
Understanding how to interpret the storage breakdown is essential for effective storage management. Here’s what each category typically represents:
- Applications: This category includes all the applications installed on your MacBook Air, along with their associated data and files.
- Documents: Any user-generated documents, such as Word files, PDFs, spreadsheets, and presentations, are included in this category.
- System: The System category encompasses macOS system files and essential system resources required for the operating system to function properly.
- Others: The Others category comprises miscellaneous files that do not fall into the aforementioned categories. This can include caches, temporary files, and other system-generated data.
Tips for Optimizing Storage Space
Now that you’ve checked your MacBook Air’s storage and gained insights into your storage usage, it’s time to optimize and manage your storage space effectively. Here are some expert tips to help you make the most out of your available storage:
- Delete Unnecessary Files and Applications: Start by identifying and deleting any files or applications that you no longer need. This can include old documents, unused apps, and redundant media files.
- Utilize Cloud Storage Solutions: Consider utilizing cloud storage solutions such as iCloud, Google Drive, or Dropbox to offload large files and free up local storage space.
- Empty Trash Regularly: Don’t forget to empty the Trash on your MacBook Air regularly. Deleted files still occupy space until the Trash is emptied.
- Optimize Photos and Videos: If you have a large collection of photos and videos, consider using macOS’s built-in optimization tools to reduce their storage footprint without compromising quality.
- Monitor Downloads Folder: Keep an eye on your Downloads folder and move or delete any files that you no longer need to prevent it from becoming a storage hog.
Mastering storage check on your MacBook Air is a fundamental skill that every user should possess. By understanding how to check your storage effectively, interpreting storage usage, and implementing optimization techniques, you can ensure that your MacBook Air remains responsive, efficient, and ready to tackle whatever tasks come your way. So, take control of your storage today and unlock the full potential of your MacBook Air!
Advanced Storage Management Techniques
While the basic steps for checking and optimizing storage on your MacBook Air are essential, there are also more advanced techniques you can employ to further enhance your storage management skills. Let’s explore some of these advanced strategies:
Utilize Storage Management Tools
macOS comes with built-in storage management tools that can assist you in identifying and reclaiming storage space. One such tool is the “Manage” button within the Storage tab of the “About This Mac” window. Clicking on this button opens a dedicated storage management interface where you can review recommendations for optimizing your storage, such as optimizing storage, emptying Trash automatically, and reducing clutter.
Additionally, third-party storage management apps like DaisyDisk, CleanMyMac, and Disk Inventory X offer more advanced features for analyzing and managing your storage. These tools provide detailed visualizations of your disk usage, allowing you to identify large files and folders that may be consuming unnecessary space.
Enable Optimized Storage
Optimized Storage is a feature introduced in macOS Sierra that helps you save space on your MacBook Air by storing infrequently used files in iCloud and removing local copies to free up storage space. To enable Optimized Storage, go to “Apple Menu > About This Mac > Storage > Manage” and select “Optimize Storage.” You can then choose to store files in iCloud and optimize storage automatically.
Keep in mind that while Optimized Storage can help you save space on your MacBook Air, it requires an iCloud storage plan to store files in the cloud. Be sure to consider the cost of iCloud storage when utilizing this feature.
Audit and Manage System Files
System files, including macOS system files and system caches, can sometimes accumulate and occupy a significant amount of storage space on your MacBook Air. While it’s essential not to tamper with critical system files, you can perform occasional audits to identify and remove unnecessary system files safely.
Tools like Onyx and CleanMyMac offer system cleaning features that allow you to remove system caches, log files, and other temporary files safely. However, exercise caution when using these tools and always back up your data before making any system modifications.
Archive and Compress Large Files
If you have large files that you don’t need immediate access to but want to keep for archival purposes, consider archiving and compressing them to save space. macOS includes a built-in compression utility called Archive Utility, which allows you to create compressed zip archives of files and folders.
To compress a file or folder, simply right-click on it and select “Compress.” You can then move the compressed file to an external storage device or cloud storage service to free up space on your MacBook Air. Just remember to decompress the files when you need to access them again.
Invest in External Storage
If you find yourself frequently running out of storage space on your MacBook Air despite employing various optimization techniques, it may be time to invest in external storage solutions. External hard drives, solid-state drives (SSDs), and network-attached storage (NAS) devices can provide additional storage capacity for storing large files, media libraries, and backups.
When choosing an external storage solution, consider factors such as capacity, speed, connectivity options, and portability to ensure it meets your specific needs.
By implementing these advanced storage management techniques, you can take your MacBook Air’s storage optimization to the next level. From utilizing storage management tools and enabling Optimized Storage to auditing system files and investing in external storage solutions, there are plenty of strategies available to help you make the most out of your available storage space. So, don’t let storage limitations hold you back—take control of your MacBook Air’s storage today and unleash its full potential!