
Is your MacBook Air giving you a hard time? Are you staring at a blank screen, wondering why it won’t power up? Don’t panic just yet. While a non-responsive MacBook Air can be frustrating, there are several troubleshooting steps you can take to get it up and running again. In this comprehensive guide, we’ll walk you through the process of diagnosing and fixing common issues that cause your MacBook Air to refuse to turn on.
Initial Checks
Before diving into more advanced troubleshooting techniques, it’s essential to perform some basic checks to rule out simple issues.
Check the Power Adapter
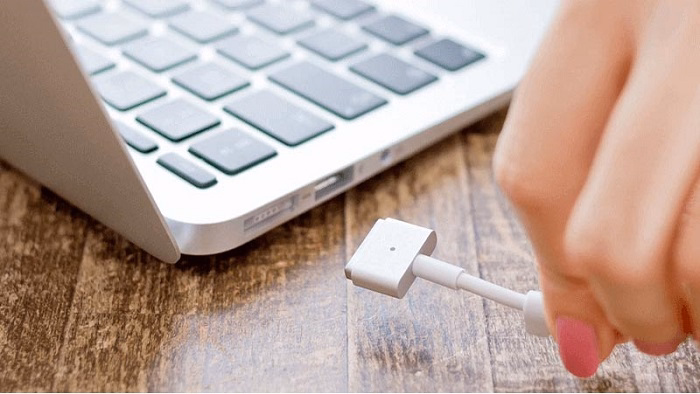
One of the most common reasons why a MacBook Air won’t turn on is a faulty power adapter. Start by ensuring that your power adapter is securely plugged into both the MacBook Air and a power outlet. Look for any signs of damage or fraying on the power cable. If everything seems intact, try using a different power outlet or borrowing a known working power adapter to see if that resolves the issue.
Inspect the Battery Indicator
If your MacBook Air is plugged in but still won’t turn on, check the battery indicator light on the MagSafe connector (for older models) or the charging status indicator (for newer models). A green light indicates that the battery is fully charged, while an amber or orange light indicates that it’s currently charging. If you don’t see any light or if the light is blinking, it could indicate a problem with the battery or the charging circuitry.
Advanced Troubleshooting Steps
If the basic checks didn’t resolve the issue, it’s time to move on to more advanced troubleshooting steps.
Reset the System Management Controller (SMC)
The System Management Controller (SMC) plays a crucial role in managing power-related functions on your MacBook Air. Resetting the SMC can often resolve issues related to power, battery, and other hardware components. The process varies slightly depending on the model of your MacBook Air. Here’s how to do it:
- For MacBook Air models with a T2 chip (2018 and later):
- Shut down your MacBook Air.
- Press and hold the power button for 10 seconds, then release it.
- Wait a few seconds, then press the power button again to turn on your MacBook Air.
- For MacBook Air models without a T2 chip:
- Shut down your MacBook Air.
- Press and hold the Shift + Control + Option keys on the left side of the keyboard, then press and hold the power button simultaneously.
- Hold all four keys and the power button for 10 seconds, then release them.
- Press the power button again to turn on your MacBook Air.
Perform a PRAM/NVRAM Reset
PRAM (Parameter RAM) or NVRAM (Non-Volatile Random-Access Memory) stores various settings such as display brightness, volume, and startup disk selection. Resetting PRAM/NVRAM can help resolve issues related to these settings. Here’s how to do it:
- Shut down your MacBook Air.
- Press the power button, then immediately press and hold the Option + Command + P + R keys simultaneously.
- Hold the keys down for about 20 seconds, then release them.
- Allow your MacBook Air to restart normally.
Boot into Safe Mode
Booting your MacBook Air into Safe Mode can help diagnose and troubleshoot software-related issues that may be preventing it from turning on properly. To boot into Safe Mode:
- Shut down your MacBook Air.
- Press the power button, then immediately press and hold the Shift key.
- Keep holding the Shift key until you see the Apple logo and progress bar.
- Once your MacBook Air has booted into Safe Mode, you can perform further troubleshooting or restart it to exit Safe Mode.
Hardware Inspection

If none of the software-related troubleshooting steps resolve the issue, it’s possible that there’s a hardware problem causing your MacBook Air to not turn on.
Check for Physical Damage
Inspect your MacBook Air for any signs of physical damage, such as cracks, dents, or liquid spills. Even minor damage can affect its ability to power on properly. Pay close attention to the areas around the power button, ports, and hinges.
Remove and Reinsert the Battery (If Removable)
If you have an older MacBook Air model with a removable battery, carefully remove the battery and then reinsert it. Sometimes, simply reseating the battery can help establish a proper connection and resolve power-related issues.
Seek Professional Help
If you’ve exhausted all troubleshooting options and your MacBook Air still won’t turn on, it’s time to seek assistance from a certified Apple technician or authorized service provider. They have the expertise and diagnostic tools to identify and repair hardware issues that may be causing the problem.
Dealing with a MacBook Air that won’t turn on can be frustrating, but don’t lose hope. By following the troubleshooting steps outlined in this guide, you can diagnose and resolve the issue, getting your MacBook Air back up and running in no time. Remember to start with simple checks like inspecting the power adapter and battery indicator, then move on to more advanced troubleshooting steps if needed. If all else fails, don’t hesitate to seek professional assistance to ensure that your MacBook Air receives the necessary repairs.
Software Troubleshooting
While hardware issues are often the culprit when a MacBook Air won’t turn on, it’s essential not to overlook potential software-related issues.
Check for Software Updates
Outdated or corrupted system software can sometimes prevent your MacBook Air from powering on correctly. Ensure that your MacBook Air is up to date by checking for and installing any available software updates. Here’s how:
- Click on the Apple menu in the top-left corner of your screen.
- Select “System Preferences” and then choose “Software Update.”
- If updates are available, follow the on-screen instructions to download and install them.
Perform Disk Utility Repair
Disk Utility is a built-in tool on macOS that allows you to manage and repair your disk drives. If your MacBook Air won’t turn on due to disk corruption or errors, running Disk Utility’s First Aid feature may help resolve the issue. Here’s how to do it:
- Restart your MacBook Air and immediately press and hold the Command + R keys until the Apple logo appears.
- Once in macOS Recovery mode, select “Disk Utility” and click “Continue.”
- Select your startup disk (usually named “Macintosh HD”) from the list on the left.
- Click on the “First Aid” button at the top of the Disk Utility window and follow the on-screen instructions to run the repair process.
- After the repair is complete, restart your MacBook Air and check if it powers on properly.
Boot into Recovery Mode
If your MacBook Air still won’t turn on after attempting the above steps, you can try booting into Recovery Mode to perform additional troubleshooting and repair tasks. Here’s how:
- Restart your MacBook Air and immediately press and hold the Command + R keys until the Apple logo appears.
- Release the keys when you see the macOS Utilities window.
- From here, you can choose various options, including reinstalling macOS, restoring from a Time Machine backup, or using Disk Utility to repair your disk.
- Follow the on-screen instructions for your chosen action and restart your MacBook Air afterward.
Preventative Measures
Now that you’ve successfully resolved the issue of your MacBook Air not turning on, it’s essential to take some preventative measures to avoid encountering similar problems in the future.
Backup Your Data Regularly
Data loss can occur unexpectedly, whether due to hardware failure, software corruption, or other issues. To protect your important files and documents, make sure to back up your MacBook Air regularly using Time Machine or another backup solution. This way, if you ever encounter a situation where your MacBook Air won’t turn on, you can rest assured knowing that your data is safe and easily recoverable.
Avoid Overheating and Physical Damage
Excessive heat and physical damage can both cause significant issues with your MacBook Air’s hardware components, potentially leading to it not turning on. To prevent overheating, make sure to use your MacBook Air on a flat, hard surface that allows for proper airflow. Additionally, be mindful of where you place your MacBook Air to avoid accidental drops or spills that could cause physical damage.
Schedule Regular Maintenance
Just like any other electronic device, your MacBook Air requires regular maintenance to keep it running smoothly. Schedule periodic check-ups with an authorized Apple service provider to have your MacBook Air inspected for any potential issues and perform routine maintenance tasks, such as cleaning the internal components and updating firmware.
Dealing with a MacBook Air that won’t turn on can be a frustrating experience, but by following the troubleshooting steps outlined in this guide, you can identify and resolve the issue effectively. From performing basic checks and advanced troubleshooting techniques to addressing software-related issues and taking preventative measures, you now have the knowledge and tools to tackle this problem with confidence. Remember, if you ever find yourself unable to resolve the issue on your own, don’t hesitate to seek assistance from a certified Apple technician or authorized service provider. With patience and persistence, you’ll have your MacBook Air back up and running in no time.