
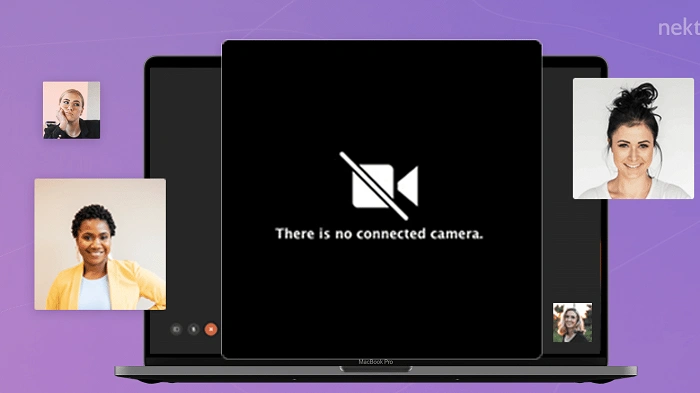
In an age where virtual communication has become the norm, a malfunctioning camera on your MacBook can feel like a major setback. Whether you rely on video calls for work, connecting with loved ones, or attending virtual events, a non-functional camera can be frustrating and inconvenient. But fear not! In this comprehensive guide, we’ll delve into the common causes behind MacBook camera issues and provide step-by-step solutions to get your camera up and running again.
Understanding the Issue: Why is Your MacBook Camera Not Working?
Before we dive into troubleshooting solutions, it’s essential to understand why your MacBook camera might be malfunctioning. Several factors could contribute to this problem, including hardware issues, software glitches, or settings misconfigurations. Let’s explore each of these potential causes in detail.
Hardware Troubleshooting
Checking Physical Connections
The first step in diagnosing a MacBook camera issue is to ensure that all physical connections are intact. Sometimes, a loose or damaged connection can result in a non-functional camera. Follow these steps to inspect the physical connections:
- Inspect the USB or Thunderbolt Connection: If you’re using an external camera, make sure it’s properly connected to your MacBook’s USB or Thunderbolt port. Ensure that the cable is securely plugged in on both ends.
- Inspect Built-in Camera: For MacBook models with built-in cameras, check for any visible damage to the camera module or surrounding components. Dust or debris buildup around the camera lens can also affect its performance.
Software Troubleshooting
Updating macOS and Camera Drivers
Outdated software can often lead to compatibility issues and bugs, resulting in a malfunctioning camera. To ensure your MacBook is running the latest software versions:
- Update macOS: Go to the Apple menu > System Preferences > Software Update. If an update is available, click on “Update Now” to install the latest macOS version.
- Update Camera Drivers: In some cases, updating the camera drivers can resolve compatibility issues. Check the manufacturer’s website for any available driver updates specific to your camera model.
Resetting SMC and PRAM/NVRAM
Resetting the System Management Controller (SMC) and Parameter RAM (PRAM) or Non-Volatile RAM (NVRAM) can sometimes resolve hardware-related issues, including camera malfunctions. Here’s how to reset these components:
- Reset SMC: Shutdown your MacBook. Press and hold the Shift + Control + Option keys on the left side of the keyboard, then press and hold the power button simultaneously. Hold all keys and the power button for 10 seconds, then release. Turn on your MacBook normally.
- Reset PRAM/NVRAM: Shutdown your MacBook. Press the power button, then immediately press and hold the Option + Command + P + R keys simultaneously. Hold these keys for about 20 seconds, then release. Your MacBook will restart.
Checking Camera Permissions and Privacy Settings
macOS includes privacy settings that control which applications have access to your camera. If these settings are misconfigured, it can prevent the camera from functioning correctly. Follow these steps to check and adjust camera permissions:
- Go to System Preferences: Click on the Apple menu > System Preferences.
- Open Security & Privacy: Select “Security & Privacy” from the System Preferences window.
- Navigate to Camera Settings: Click on the “Privacy” tab, then select “Camera” from the left sidebar.
- Check Application Permissions: Review the list of applications that have requested camera access. Ensure that the applications you’re using for video calls or camera usage are granted permission to access the camera.
Dealing with a non-functional camera on your MacBook can be a frustrating experience, but with the right troubleshooting steps, you can often resolve the issue quickly. By following the methods outlined in this guide, you’ll be able to identify the underlying cause of the problem and implement the necessary solutions to get your MacBook camera back in working order. Whether it’s a simple software update, resetting hardware components, or adjusting privacy settings, don’t let camera woes hold you back from staying connected in the digital world.
Advanced Troubleshooting Techniques

While the previous sections covered some basic troubleshooting steps, there are additional advanced techniques you can try if the issue persists.
Running Diagnostics
macOS includes built-in diagnostic tools that can help identify hardware problems, including issues with the camera. To run diagnostics:
- Shut Down Your MacBook: Ensure your MacBook is turned off.
- Start Diagnostics: Turn on your MacBook and immediately press and hold the D key until the Apple Diagnostics screen appears.
- Follow On-Screen Instructions: Follow the on-screen instructions to run the diagnostics. The system will check various hardware components, including the camera, for any issues.
- Review Results: Once the diagnostics are complete, review the results to see if any hardware problems were detected.
If the diagnostics report any camera-related issues, you may need to contact Apple Support or visit an authorized service provider for further assistance.
Safe Mode Troubleshooting
Booting your MacBook in Safe Mode can help isolate software-related issues that may be affecting the camera’s functionality. Safe Mode prevents third-party extensions and startup items from loading, allowing you to troubleshoot software conflicts. Here’s how to boot into Safe Mode:
- Shut Down Your MacBook: Ensure your MacBook is turned off.
- Start in Safe Mode: Turn on your MacBook and immediately press and hold the Shift key until the Apple logo appears.
- Release Shift Key: Release the Shift key once you see the login window. Your MacBook is now in Safe Mode.
- Test Camera: Once in Safe Mode, test the camera to see if it’s functioning properly. If the camera works without any issues, it suggests that a third-party software or extension may be causing the problem.
To exit Safe Mode, simply restart your MacBook normally.
Hardware Repair or Replacement
If you’ve exhausted all software troubleshooting steps and the camera still isn’t working, it’s possible that there’s a hardware fault that requires repair or replacement. Depending on your MacBook model and warranty status, you may have a few options:
- Contact Apple Support: If your MacBook is still under warranty or covered by AppleCare, contact Apple Support for assistance. They can help diagnose the issue and arrange for repairs if necessary.
- Visit an Authorized Service Provider: If your MacBook is out of warranty, you can visit an authorized Apple service provider for a professional assessment and repair.
- DIY Repair: If you’re comfortable with electronics and have the necessary tools and expertise, you may attempt to repair the camera yourself. However, keep in mind that DIY repairs can void your warranty and may further damage your MacBook if not done correctly.
Preventive Maintenance Tips
Once you’ve resolved the camera issue, it’s essential to take preventive measures to ensure it doesn’t recur in the future. Here are some tips to maintain the health of your MacBook camera:
- Keep Your Software Updated: Regularly update macOS and camera drivers to ensure compatibility and stability.
- Handle Your MacBook with Care: Avoid dropping or mishandling your MacBook, as physical damage can affect the camera and other components.
- Use a Camera Cover: Consider using a camera cover or privacy shield when the camera is not in use to protect it from dust and debris.
- Clean the Camera Lens: Periodically clean the camera lens with a soft, lint-free cloth to remove dirt and smudges that may affect image quality.
- Avoid Exposure to Extreme Conditions: Keep your MacBook away from extreme temperatures, moisture, and humidity, as these can damage sensitive components, including the camera.
By following these preventive maintenance tips, you can prolong the lifespan of your MacBook camera and minimize the risk of future issues.
Troubleshooting a non-functional camera on your MacBook may require patience and persistence, but with the right approach, you can often identify and resolve the underlying cause of the problem. From basic software updates and settings adjustments to advanced diagnostics and hardware repairs, there are numerous avenues to explore in restoring your MacBook camera to working order. Remember to follow proper preventive maintenance practices to keep your camera and MacBook in optimal condition for all your virtual communication needs.